Monday 26 May 2014

3 Ways With Potato...

I see a lot of parents who panic about the thought of cutting out one or two foods. Milk, egg, wheat and soya free can be a bit more of a challenge, but what do you do when your child can only tolerate potato and a couple of fruits? It will be a long journey trying to expand their repertoire so just in case there is a limit to how many times you can face chips, I thought I'd have a go at a few alternatives to expand their choices!

Please scroll down for recipes for Potato Farls, Potato Gnocchi and Potato Biscuits!

Potato Farls (makes 8)


400g Floury Potatoes (e.g. King Edward) - about 3 medium potatoes
40g Potato Flour (or any other flour you can tolerate)
salt and pepper (optional, I didn't bother)

Prick the potatoes with a fork.

Microwave (or oven bake) until soft - in my microwave this takes about 4mins, then I turn them over and do another 2mins.

Cool enough to handle, then peel off the skins.

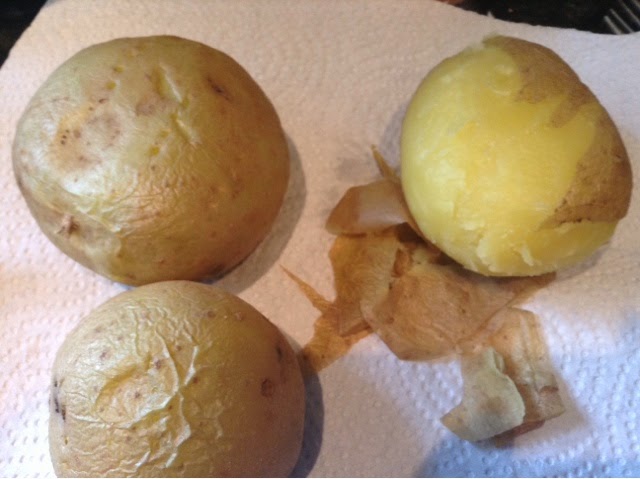
Mash the flesh with a fork (you could add a little dairy and soya free spread or vegetable oil, but I did it without for this).

Add salt and pepper, if using.

Mix in the flour and knead gently to form a soft dough.

Divide the mixture in 2.

Press, or roll, out onto a floured (use potato flour for this too) board until about 4-5mm thick.

Cut into 4.

Place on a hot griddle/frying pan until lightly browned.

Flip over and fry the other side.

Repeat with the rest of the mix.

Any left over are nice toasted and spread with a little dairy and soya free spread.

For some more creative ideas on how to use your potato cakes, check out The Recipe Resource here.

Gnocchi 

I tried with the other half of the mix from the potato farls initially, but without the extra flour to hold them together, they just floated away in the water. 

400g Floury Potatoes (e.g. King Edward)
80g Potato Flour (or any other flour you can tolerate)
salt and pepper (optional, I didn't bother)

(For pictures of the initial stages, see above as I used the same batch to make 1/2 quantity of each recipe)

Prick the potatoes with a fork.

Microwave (or oven bake) until soft - in my microwave this takes about 4mins, then I turn them over and do another 2mins.

Cool enough to handle, then peel off the skins.

Mash the flesh with a fork (or masher, or ricer…).

Add salt and pepper, if using.

Mix in the flour and knead gently to form a soft dough.

Roll out into long sausages about 1cm thick.

Cut into 2cm lengths.

Press the top lightly with a fork (dip in more potato flour if sticking).

Place in boiling water and simmer for 2-3 mins until float up to the surface (you may want to do this in batches and remove from boiling water with a slotted spoon).

Toss in olive oil (or other suitable oil), dairy & soya free spread.

Or for the creamy pesto topping in the next picture:
Toasted some chopped hazelnuts (ran out of pine nuts), add a spoonful of suitable pesto* and dairy free cream, stir together, then toss in the gnocchi.


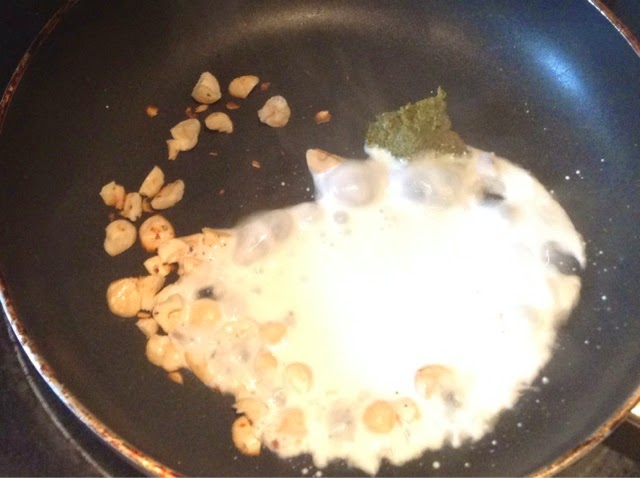
*Barts Infusions Basil Paste - not technically pesto, but has all the taste with no pesky cheese or nuts added (haven't checked for traces)
*Le Conserva Della Nonna Dairy, Nut and Gluten Free Green Pesto Sauce (contains pine nuts)


Biscuits

This isn't like a normal dough to handle, so my advice is be gentle, use a small cutter and I probably wouldn't start with a fancy shaped one...

80g Potato Flour
20g Caster Sugar
2tsp Suitable Vegetable Oil (I used sunflower)
50g apple and strawberry puree* (or other suitable fruit puree)
extra sugar for sprinkling

Put flour and sugar in a bowl.

Add the oil and most of the fruit puree.

Mix with a knife until it all comes together.

If it's still a little dry (visible flour) add more fruit puree.

Knead lightly (this is an unusual texture to work, like playing with wet sand but without the grittiness, so don't panic and think you're doing it wrong).

Place on a piece of floured (use potato flour again) cling film.

Lightly flatten with you hand.

Top with another piece of cling film and roll out very thinly (about 2 mm).

Dip your cutter in potato flour and cut shapes.

Carefully move them onto a baking tray (don't bother trying to lift by hand, they will break, use a pallet knife - or fish slice -, I had to dip mine in flour again before sliding under each biscuit or they stuck to the knife).

Sprinkle with a little extra caster sugar  (I forgot to do this and after 10 mins baking wet the tops with water, then sprinkled some with sugar).

Bake at 180ºC for 20mins, turn over and bake for another 10 mins (mine were baked for 40mins and were very hard, so hopefully reducing cooking time will give the right amount of crunch…). Surprisingly pleasant biscuit, despite the restrictions! As they are so crispy, I might try a savoury  cracker version too.


Sunday 11 May 2014

Turkey Kebabs with Jewelled Rice


I know I'm not very good at posting savoury recipes, mostly because dinner is usually just cobbled together, but I posted this on Twitter today and Ginny requested the recipe. I don't have exact quantities, or pictures of the process, but here goes… Remember, a recipe is just a guide, change veg/spices etc to suit your likes or needs.
For something like this, a selection of roasted Mediterranean veg would work well, but I had a bendy parsnip and a chunk of butternut squash that needed using… The Coconut milk yoghurt was earmarked for a key lime pie, but seemed too cold and windy to make it today, (definitely a hot pudding day…) so thought I'd experiment with a marinade for the turkey steaks lurking in the back of the fridge.

Kebabs:

2 thick turkey steaks, cut into 2cm chunks
2tbsp Coconut Milk Yogurt (unsweetened) e.g. CoYo/Coconut Cooperative
1tbsp Coconut Sugar/Palm Sugar/Honey (or any other sugar)
Juice of 1/2 a Lemon
1 Clove of Garlic, Finely Chopped 

Mix all marinade ingredients together.

Stir in turkey until well coated and set aside (I think mine only marinated for about 20 mins, you could leave it in the fridge for a couple of hours).

Put meat onto skewers (I left gaps between pieces so they would cook quicker).
Ready to grill
Grill under a hot grill until browned (would be great BBQ'd too).

Turn over, grill the other side (I was too impatient to brown them much, which is a shame as the brown bits had taken on an almost tandoori taste - could have been the smoking bamboo skewers…).

Jewelled Rice:

Brown Rice - probably about a cup full (I use 2 ramekin dishes full for 4 of us)
1 Large Parsnip
Butternut Squash (1/2 of the end with the seeds)
Vegetable oil
2 whole cloves of garlic
1 clove of garlic, chopped
Handful of Raisins
Handful of Chopped Nuts (I used almonds)
Zest of 1/4 Lemon
2 Balls Frozen Chopped Spinach (defrosted in microwave)
1/2 tsp Ground cinnamon
1/2 Cumin seeds (lightly crushed)
1/2 Whole mustard seeds (lightly crushed)
1/2 Mixed Spice
2 Cardamom pods

Finely chop the parsnip and butternut squash, lightly crush the whole cloves of garlic, drizzle with oil and roast until softened and lightly caramelised.

Rinse rice, then put in pan with 2 cups of cold water (double volume of water to rice).

Bring to the boil, then simmer until water mostly absorbed (about 20 mins, while veg roasting).

Put lid on rice and leave to rest for 5 minutes.

Fry the nuts (if using), spices, chopped garlic, raisins and lemon zest for a couple of minutes.

Chop the roasted veg smaller, if necessary (and your trying to convince 7 year old to eat them), and stir into the spice mix.

Remove the whole cardamom pods and discard.

Stir veg into the cooked rice and mix well.


Saturday 3 May 2014

Herby Waffles


This is something else that's always in the freezer for emergency packed lunch or picnic food as an alternative to bread (unless Mini Monster has snuck them all out of the kitchen while cooling…). They are light enough that even taken out of the freezer that morning, they have defrosted by lunchtime. Team 3 or 4 triangles with some strips of meat (or other suitable protein), veg sticks and cherry tomatoes as an alternative to a sandwich.
1 cup wheat free white bread flour
1 tsp egg replacer
1 tsp baking powder
1 tbsp caster sugar
1 1/2 tbsp vegetable oil
1 cup oat milk (or other milk substitute)
1 tsp vanilla

Heat waffle iron on a medium heat.


Put dry ingredients and herbs in a bowl and mix together.
Add the milk substitute.
Slowly beat into the rest of the ingredients with a balloon whisk or wooden spoon until a thick smooth batter is formed.
Brush (or spray) waffle iron with a little oil.

Pour batter into hot waffle iron and cook. If, like me, you are not using an electric one, turn  over frequently and continue to cook until it stops steaming.
Remove from waffle iron and put on a plate while you continue to cook the rest of the batter. The above recipe makes about 4 rounds on my waffle iron. 
These freeze brilliantly for when needed


Friday 2 May 2014

Marshmallows

Pre school are having a cake sale tomorrow and needed things to sell. Every time I need to bake for school or pre school, I have the 'do I buy eggs and flour and make "normal" cake', or 'do I make free from cake' dilemma. Free from cake is always better fresh, so didn't want to make it 2 days ahead, and knew I wouldn't be up to baking after a 12 hour shift at work today. Mini Monster was home yesterday, and always likes to help me cook, so didn't really want to use eggs or wheat. In a lightbulb moment, I thought of marshmallows. Easy to make, can be made in advance, not many ingredients, loved by most AND allergy friendly! 

6 Sheets Leaf Gelatine (I haven't had a go with vegetarian gelatine yet, but I'm sure it's possible too)
220g Caster Sugar
80g Golden Syrup
60mls Water (or Fruit Juice/Fruit Puree) 
1/2 tsp Vanilla Paste (or extract)*
few drops of Lemon Juice*
Icing Sugar and Cornflour* for dusting

*optional (can omit if need to)

Put sugar and syrup into a pan and just cover with cold water.

Heat gently until most of the sugar dissolved (do not allow it to boil at this stage) - swill the pan rather than stirring.

Remove from heat and put a tight fitting lid on pan for 10 minutes (the steam helps dissolve any sugar crystals remaining on the sides of the pan - if you leave these it will affect the caramelisation).

Remove lid and return to heat.


Meanwhile, soak gelatine sheets in cold water for 10 minutes, or until soft.
Drain water off the gelatine and microwave for 20 seconds to dissolve. 


Add a few drops of lemon juice to the water (or fruit juice/fruit puree) - if you don't have a microwave, add boiling water, or hot fruit juice to the softened gelatine.

Pour into large bowl.

Bring the sugar syrup to a boil and boil until you get to 130ºC - if you don't have a sugar thermometer, this is the 'hard ball' stage (fill a glass with cold water. Once the syrup has boiled rapidly and is starting to change colour, put a few drops into the water. If it breaks up it's not ready, if it goes into a long string it's not ready, if it forms a ball, but it's still soft when you squash it it's not ready, when if it forms a ball that is hard, you are there!)
Slowly pour the syrup into the gelatine mix, whisking constantly (don't pour the syrup onto the whisk). 

Continue to whisk until thick and pale and producing threads like chewing gum.

Add vanilla, if using.
Pour into a tin lined with oiled cling film (for this recipe I use my tray bake tin, which is about 18x25cm) - remember to oil you spatula to scrape the bowl to stop it sticking.

Smooth the top and set aside until firm - Cover with oiled cling film if necessary.

Sieve cornflour and icing sugar mix onto some greased proof paper, tip marshmallow onto it.

Sieve oven more cornflour and icing sugar (to stop knife sticking).

Use a sharp knife to cut into chunks. 

Toss in the cornflour until all sticky edges are covered.

Left: made with raspberry puree  Right: made with water and vanilla paste
Store in an airtight container.